Fall Pre-School Craft
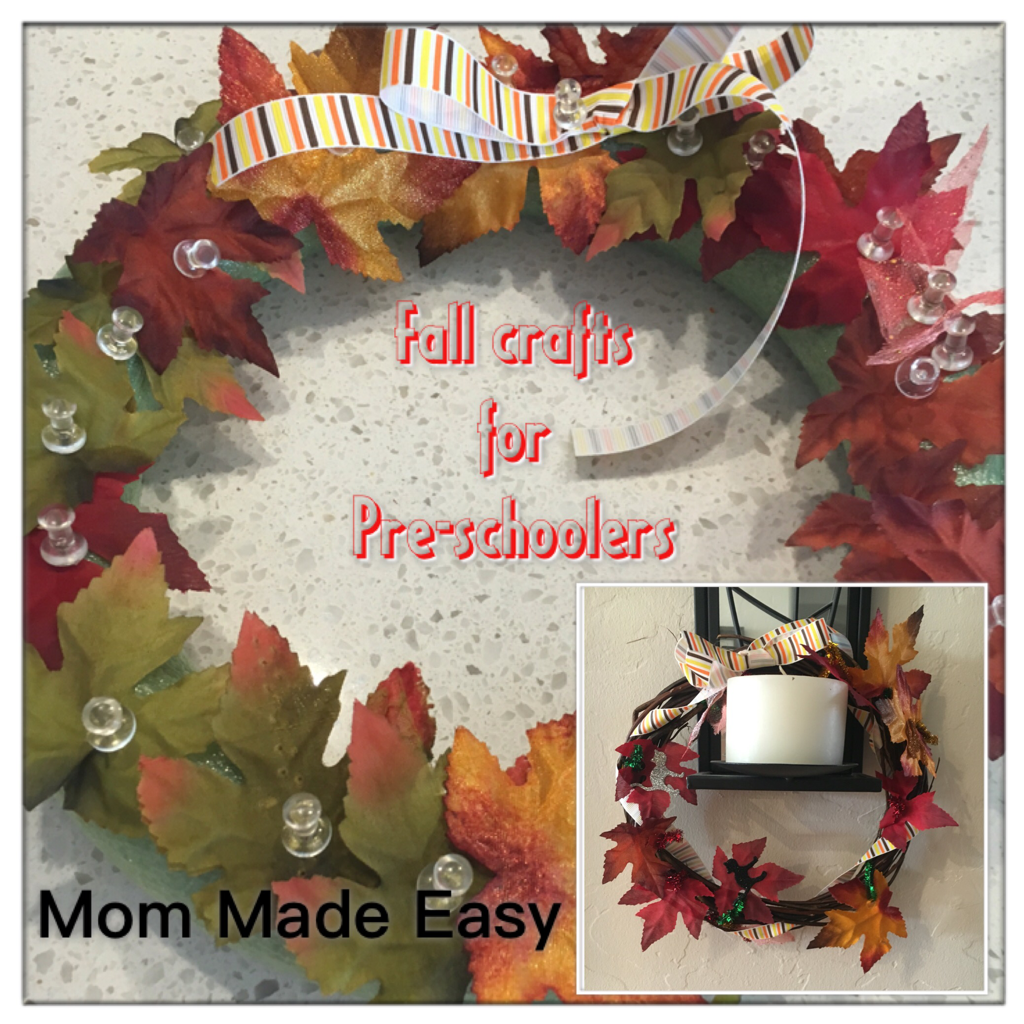
My goal yesterday was to find a craft for both my 3 and 5 year old (boys). I thought up this craft as I was standing in the aisle of the Dollar Tree. Didn't turn out too shabby I must say, and I was able to get all of the supplies there! I'm adding links to the bottom for Amazon if you don't have a Dollar Tree near you.
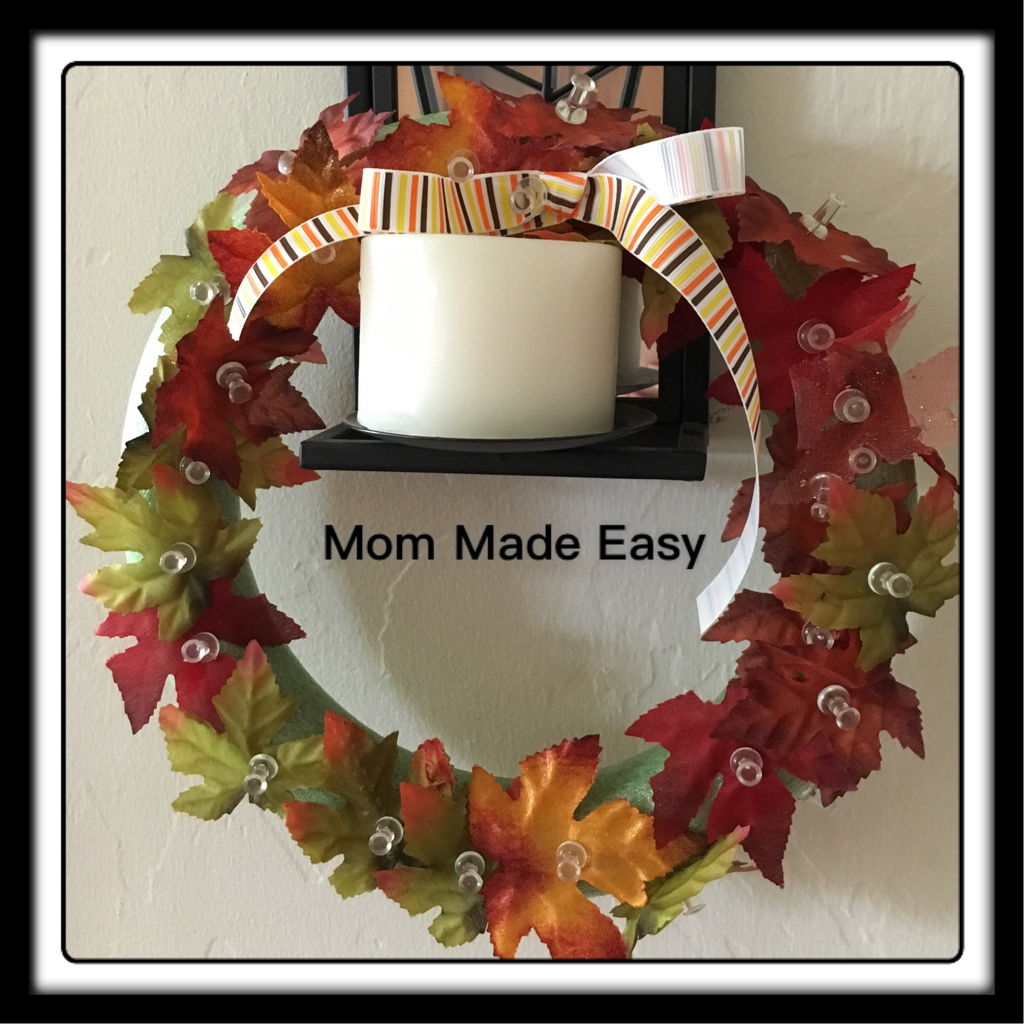
:What you will need for the foam wreath:
- Fake fall leaves
- Ribbon
- Clear thumb tacks
- Foam wreath
Total cost: $4!
This was the perfect craft for my 3 year old who has a very short attention span for crafts. I pushed 1 thumb tack into a leaf and guided him to push the leaf/thumbtack into the foam wreath. When the wreath was covered in leaves, I helped him tack a bow (I had prepared earlier) onto the top. ** Note: THIS NEEDS TO BE SUPERVISED DO TO THE SHARPNESS OF THE TACKS.**
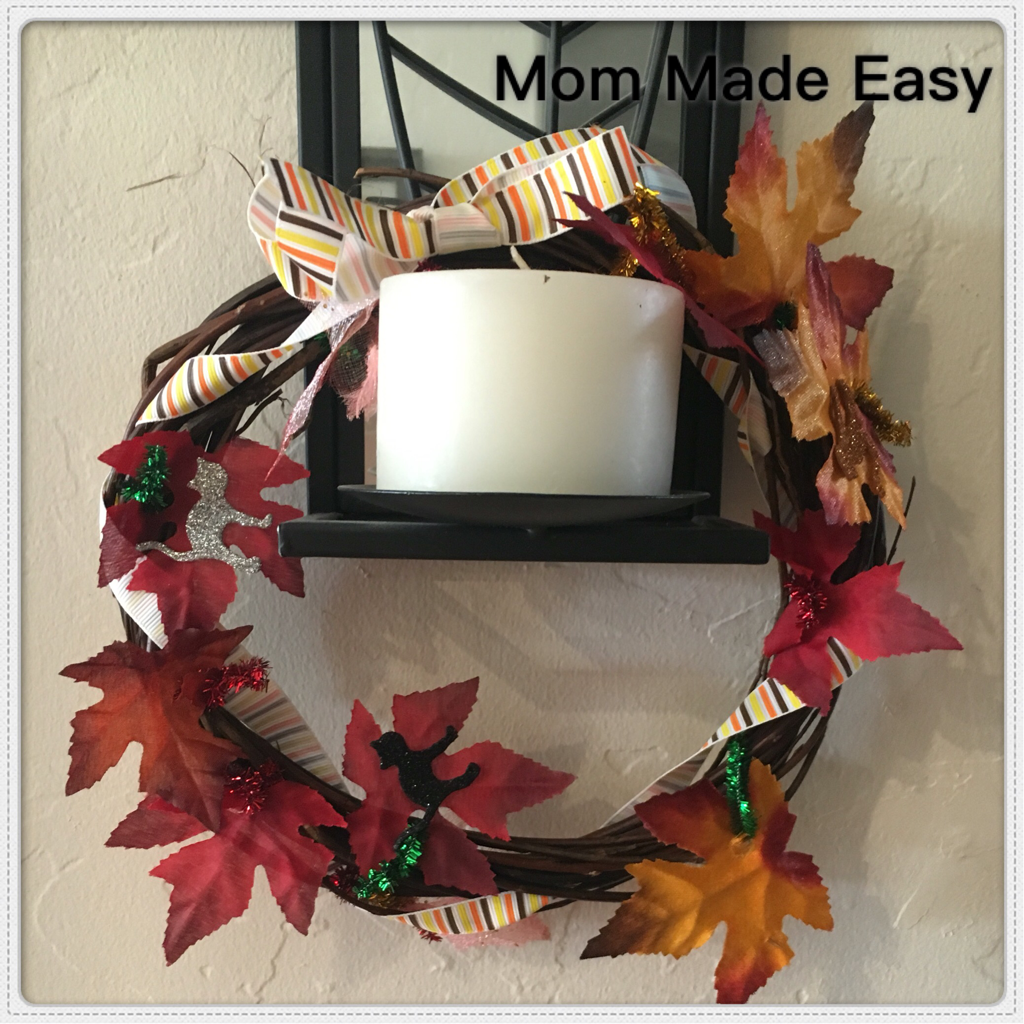
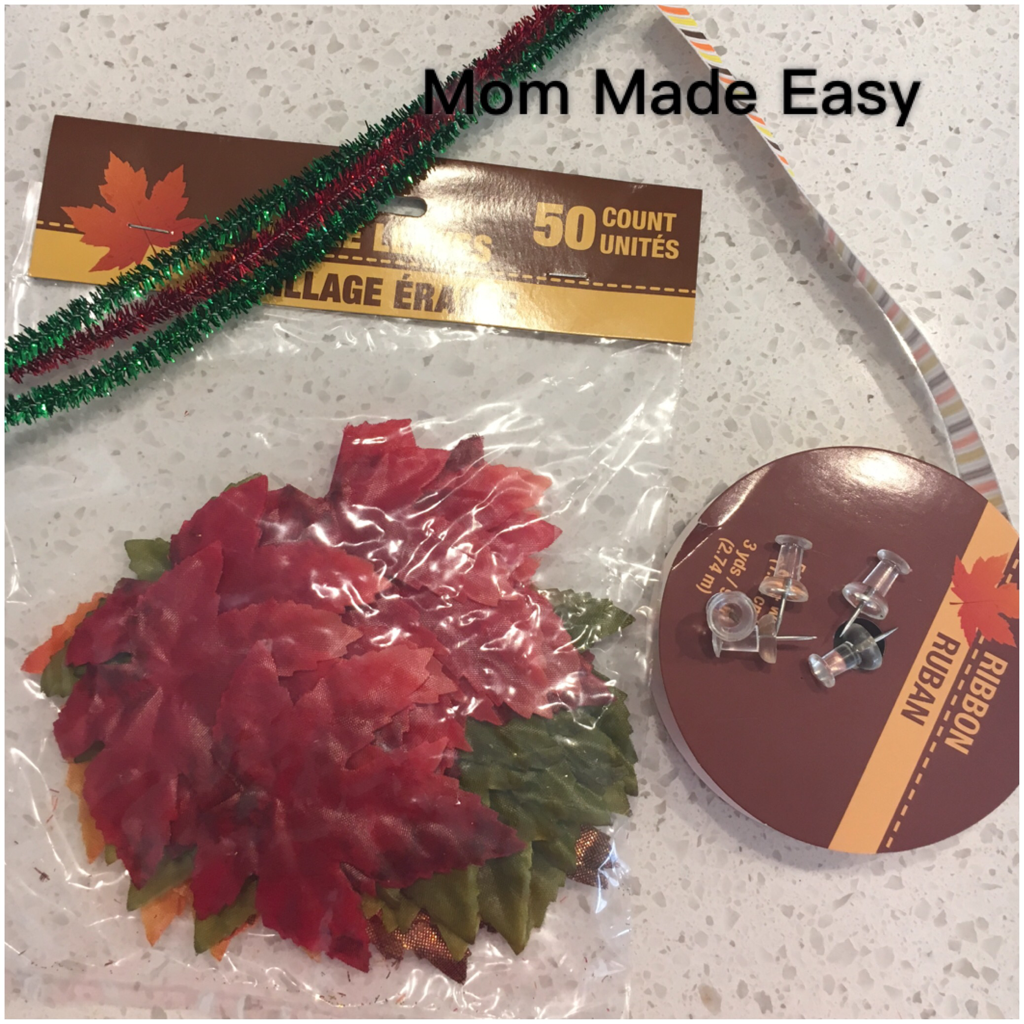
What you will need for the wooden wreath:
- Fake fall leaves
- Ribbon
- Wooden wreath
- Pipe cleaners (we got the sparkly option for extra fun)
Total cost: Less than $4 (supplies can be used between both wreaths).
This was a perfect crab to do independently for my 5 year old. I prepped it by cutting the pipe cleaners into 2" pieces and punching holes into the leaves. Then "A" poked one pipe cleaner in between the wooden straws, then into the hole of the leaf, and twisted it closed. After he had attached several leaves, we added ribbon.
|
|
|
|
Proper way to Hold a Writing Instrument
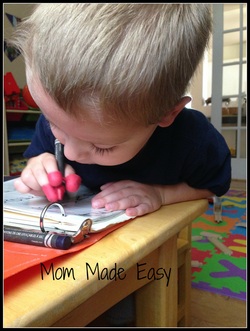
Because I am a kindergarten teacher, I have been working really hard to teach my son the proper way to hold his pencil/crayon. However, he's been working hard doing exactly the opposite of what I've taught him.
So I went to Amazon and bought pencil grips that I've used with students in the past. They work very well and position the child's fingers correctly by using finger holes. My son has done really well with these grips and is starting to hold the pencil correctly even when he doesn't have the grips on. Just remember, the big hole is where the thumb goes.
I'm also a fan of the large beginner pencils which are easier for little ones to grasp.
It's important to teach your child the correct way to hold a writing instrument from the beginning so they don't have to relearn when they get to school.

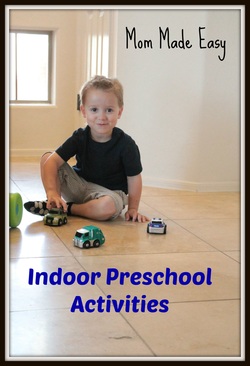
Indoor Summer Activities
Summers in Arizona are very long. Especially when you don't have a pool. 😢 I've been trying and trying to come up with indoor activities for my 3.5 year old and thought I'd share them. I have my "An Activity A Day for Summer" further down on this page, but I am finding I need more indoor activities that hold his attention longer. Also, some of these activities can be independent in case I am busy with his brother. I'll keep adding on throughout the summer.
1) Rice bin: my son can spend hours pouring, scooping, and shaking rice. I have him a big lidded bin of uncooked brown rice (because my husband wouldn't eat it). Then I threw in old scoops from baby formula, empty spice containers, empty Parmesan cheese containers, spoons, and funnels. It can be messy, but actually it's very easy to sweep up uncooked rice and put it back into the bin.
2) Kinetic sand: This sand is amazing. It sticks together and has a very cool texture. It also can provide hours of entertainment. My only suggestion is that you buy a large shallow Tupperware to store it in (and your child can play with it in the container).
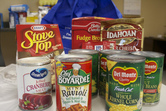
3) CUTTING! This is good for fine motor skills and my son loves it because he feels like such a big boy.
I save cereal boxes and cracker boxes with characters on them (the thin cardboard type). Then I give my son scissors and let him go at it cutting his favorite characters out. For example, he cut out Doc Mcstuffins from a fruit snack box, and the Minions from a Cheese Nips box.
REMEMBER TO SUPERVISE YOUR CHILD WITH SCISSORS!
4) Workbooks: These workbooks are good for one on one time with your child. Look for the preschool specific workbooks.
5) Playdoh: You can buy so many fun playdoh toys. My son's favorite is the garbage truck and Doc Mcstuffins.
6) Driving cars on a close mirror city: I drew roads and buildings on my closet mirror (and labeled everything for sight word practice) and A loves driving his cars and trains on the mirror. This is a good activity while I'm trying to get ready. *picture coming*
7) Car Races: I sit on one end of the room and my son sits on the other end and we each make our cars go towards each other (we have the pull back cars that go on their own). When they collide, now that is fun!!
1) Rice bin: my son can spend hours pouring, scooping, and shaking rice. I have him a big lidded bin of uncooked brown rice (because my husband wouldn't eat it). Then I threw in old scoops from baby formula, empty spice containers, empty Parmesan cheese containers, spoons, and funnels. It can be messy, but actually it's very easy to sweep up uncooked rice and put it back into the bin.
2) Kinetic sand: This sand is amazing. It sticks together and has a very cool texture. It also can provide hours of entertainment. My only suggestion is that you buy a large shallow Tupperware to store it in (and your child can play with it in the container).
3) CUTTING! This is good for fine motor skills and my son loves it because he feels like such a big boy.
I save cereal boxes and cracker boxes with characters on them (the thin cardboard type). Then I give my son scissors and let him go at it cutting his favorite characters out. For example, he cut out Doc Mcstuffins from a fruit snack box, and the Minions from a Cheese Nips box.
REMEMBER TO SUPERVISE YOUR CHILD WITH SCISSORS!
4) Workbooks: These workbooks are good for one on one time with your child. Look for the preschool specific workbooks.
5) Playdoh: You can buy so many fun playdoh toys. My son's favorite is the garbage truck and Doc Mcstuffins.
6) Driving cars on a close mirror city: I drew roads and buildings on my closet mirror (and labeled everything for sight word practice) and A loves driving his cars and trains on the mirror. This is a good activity while I'm trying to get ready. *picture coming*
7) Car Races: I sit on one end of the room and my son sits on the other end and we each make our cars go towards each other (we have the pull back cars that go on their own). When they collide, now that is fun!!
|
|
|
|

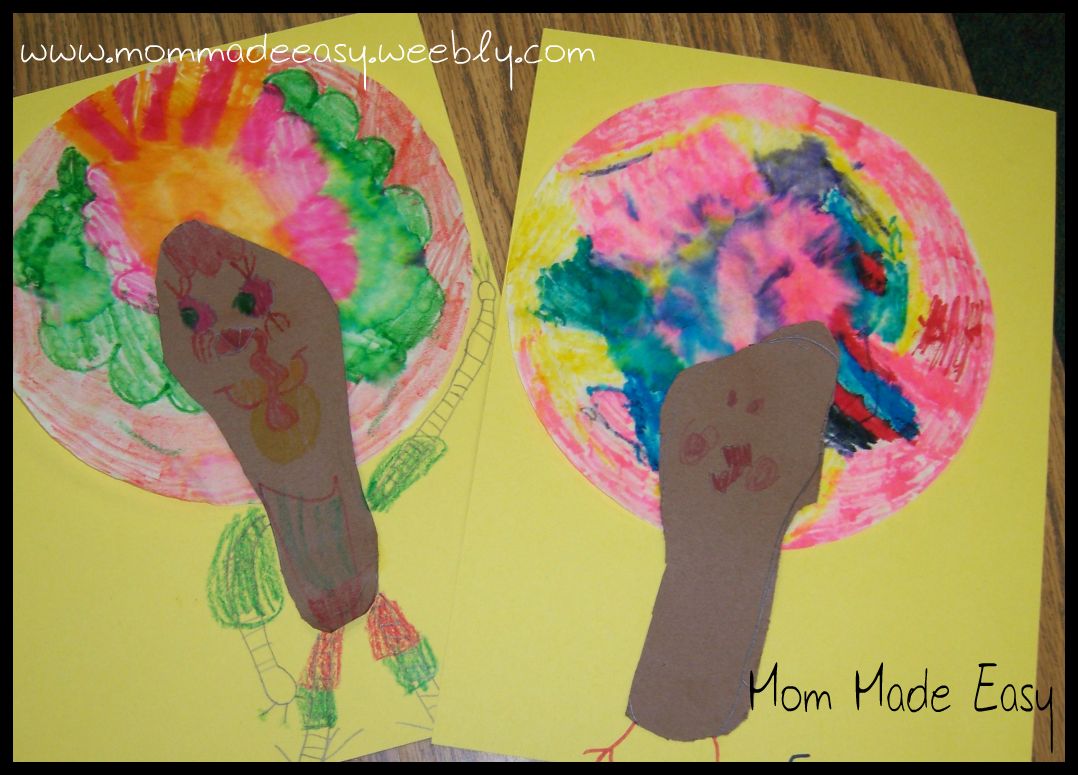
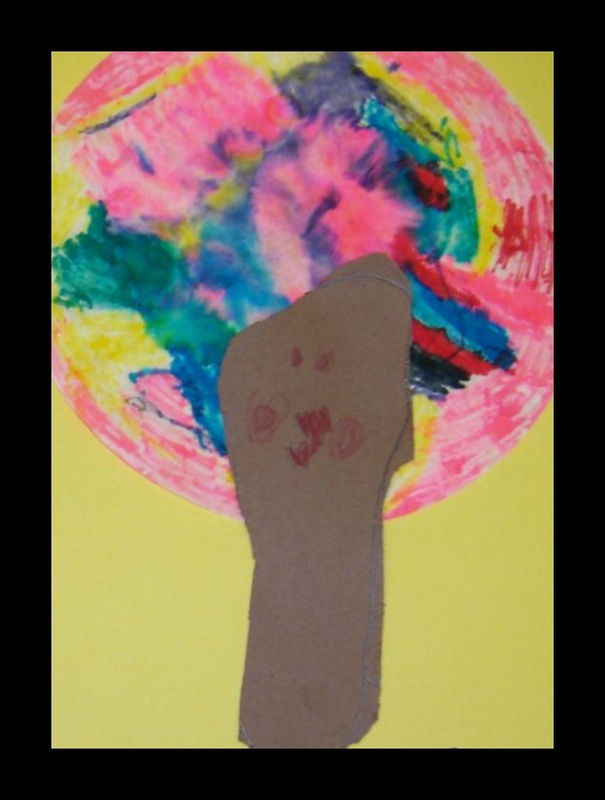
Tye Dyed Coffee Filter Turkey Footprints
This is a super fun and super easy activity.
Supplies:
- 1 white coffee filter per child
- Washable crayola markers (I learned the hard way and didn't use washable)
- Either. . 1 spraybottle or 1 eyedropper or cup for water
- Water
- 1 brown sheet of construction paper
- 1 colored sheet of construction paper
- scissors
- pencil or pen
Directions:
1) Trace your child's foot on the brown construction paper
2) Help your child cut their footprint out
3) Let your child draw a turkey face on their footprint. (You can also use colored paper to cut out a beak and use googly eyes.)
4) Let your child go crazy with the washable markers and color the ENTIRE coffee filter.
Hint: You may need to hold the coffee filter while they color it and you may want to put a protective cover on the surface your child is using.
5) Wet the coffee filter to allow the colors to run together. You can wet it 3 ways. .
1) Use a spraybottle and have your child lightly spray it a couple times
2) Use an eyedropper and let your child drop a few drops of water over each part of the coffee filter.
3) Have your child wet their hand in a cup of water and spritz the coffee filter.
*Don't drench it!! :)
6) Allow the coffee filter to dry
7) Glue the coffee filter onto the TOP of the separate paper.
8) Glue the footprint on the coffee filter so it's slightly lower.
9) Have your child draw legs on the turkey.
You can frame it and hang this masterpiece every Thanksgiving!

Wednesday 5/30/12
Acts of Kindness
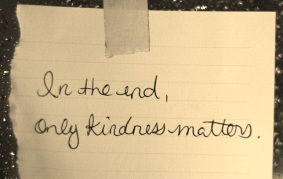
Kindness is defined as: noun
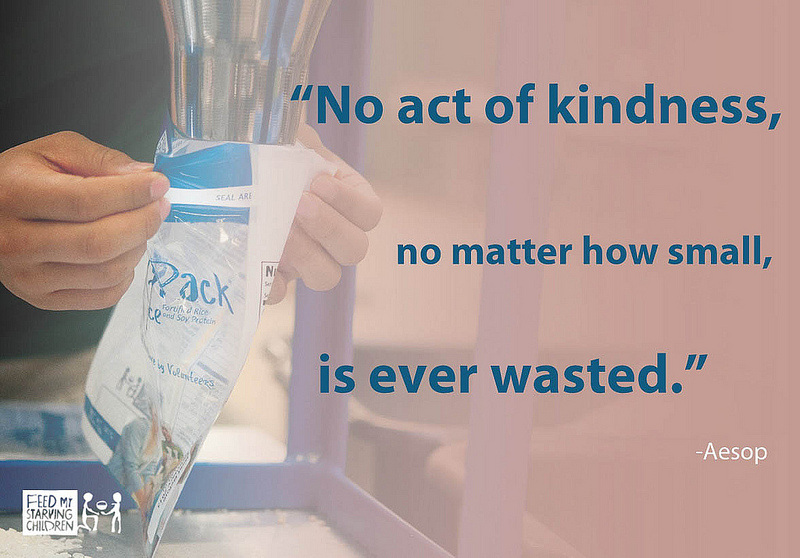
I have learned and witnessed that kids are naturally egocentric. This doesn't mean that they can't or won't think about others. As a parent, I know it is important to teach my child(ren) how to be kind and care about others. Currently it seems that the focus in this country is about bullying and hatred. I was thinking about how we could turn that around and make it about kindness and character, so I came up with a list of acts of kindness that every child can do. Even if he/she can't write yet, these acts can be modified to their level.
Here are some ideas:
1) Make cookies or a treat and deliver them to the neighbors. Include a handwritten note.
2) Make a craft (or 2 or 3) and deliver them to the local nursing home.
3) Write their former teachers a note. Have your child write down one special memory or something they learned from that particular teacher.
4) Donate unwanted/unused toys and clothing to The Big Brothers or Goodwill.
- The quality of being friendly, generous, and considerate.
- A kind act. [Google Dictionary]
I have learned and witnessed that kids are naturally egocentric. This doesn't mean that they can't or won't think about others. As a parent, I know it is important to teach my child(ren) how to be kind and care about others. Currently it seems that the focus in this country is about bullying and hatred. I was thinking about how we could turn that around and make it about kindness and character, so I came up with a list of acts of kindness that every child can do. Even if he/she can't write yet, these acts can be modified to their level.
Here are some ideas:
1) Make cookies or a treat and deliver them to the neighbors. Include a handwritten note.
2) Make a craft (or 2 or 3) and deliver them to the local nursing home.
3) Write their former teachers a note. Have your child write down one special memory or something they learned from that particular teacher.
4) Donate unwanted/unused toys and clothing to The Big Brothers or Goodwill.

|
5) Write thank you notes to the veterans and deliver them to the local Veterans Hospital.
|
6) Do a chore for an elderly friend or neighbor such as pulling weeds, sweeping their porch (just be sure to ask them first).
7) Do one nice thing for each family member (pack a lunch for a sibling, make a sandwich for daddy, help find a toy for the baby).
7) Do one nice thing for each family member (pack a lunch for a sibling, make a sandwich for daddy, help find a toy for the baby).

|
8) Write a thank you note and include it in a small gift (from the dollar store) for the mail man/woman. Your child can place it in the mailbox by him/herself. 9) Let your child pick out a couple cans of food either from the store or your pantry and take them to the food bank. |
10) Write a letter or draw a picture for the grandparents. Let your child put it in the mailbox.
11) Encourage a friend. Find out if your child’s friend is playing a game, acting in a play, or doing something new and take your child to that event to cheer their buddy on.
11) Encourage a friend. Find out if your child’s friend is playing a game, acting in a play, or doing something new and take your child to that event to cheer their buddy on.
|
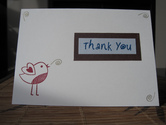
12) Remind and help your child make thank you cards for the gifts they have received.
|
13) Help your child write one nice thing about each family member on a sticky note. Then let your child find a good spot to stick the notes where the family member will find them.
14) Pick flowers from the garden or get a couple flowers from the store and let your child pick who they want to give each flower to
.15) Walk around the neighborhood with your child and pick up the garbage (you may want to purchase gloves first, and teach your child to leave any sharp items on the ground).
16) Send a package, write a letter, or draw a picture for our servicemen/women who are protecting our freedom. You can go to www.anysoldier.com for help with where and who to send these packages/letters to.
Try and talk with your child about how it feels to be kind. It should make everybody involved feel good. Kindness never hurts!

The summer can be lllllooooonnnnngggg! But no fret, I've come up with a list of activities for you to do with your pre-schooler and/or kindergartner. Now remember, I live in the southwest and it gets ridiculously hot here, so a lot of these activities are indoor.
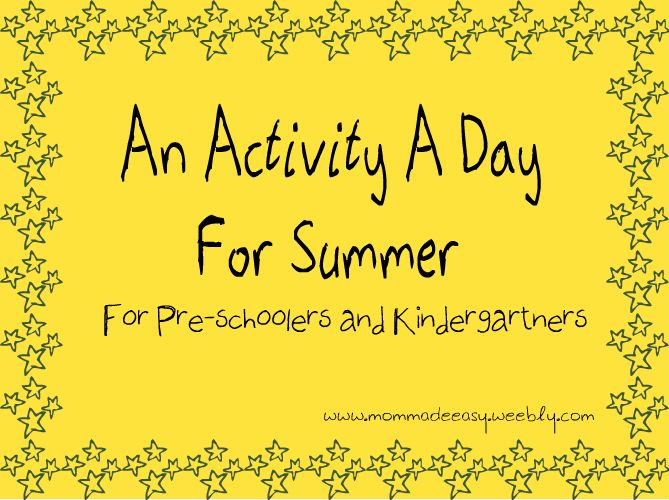
Listed below are the activities: Please scroll down below the list for descriptions and suggestions:
If you happen to take pictures of your child having fun with any of these activities, please share and email them to [email protected].
If you happen to take pictures of your child having fun with any of these activities, please share and email them to [email protected].
|
Day 1: Cardboard pictures
Day 2: Make a city Day 3: Make stained glass Day 4: Plant an indoor garden Day 5: Puzzles Day 6: Make your own play-dough Day 7: Put on a puppet show Day 8: Have a scavenger hunt Day 9: Plant flowers outside Day 10: Tracing Day 11: Make a photo album Day 12: Bake a treat Day 13: Sort objects Day 14: Have a "car" wash Day 15: Build a fort Day 16: Run in the sprinklers Day 17: Go Bowling Day 18: Make an edible building Day 19: Build! Day 20: Make confetti Day 21: Alphabet hunt Day 22: Write a story Day 23: Make masks Day 24: Create leaf rubbings Day 25: Make ice-cream |
Day 26: Have a (indoor) picnic
Day 27: Dr. Seuss day Day 28: Family memory Day 29: Indoor hopscotch Day 30: Bath your toys Day 31: Make an Edible Necklace |
Day 1: Cut pictures out of old cereal or crackers boxes and glue onto another piece of paper.
Then use crayons to make their own picture.
*Remember to have your child use "kid" scissors and please supervise.*
Day 2: Draw a "city" with streets and parking lots on your patio or sidewalk with chalk:
Then your child can drive their toy cars around the city they created. They sell thick sidewalk chalk at Target or the dollar store. These are good to use outside because they don't break and help with fine motor skills. (And girls will like it too. hehehe)
Day 3: Make stained glass:
Stretch plastic wrap around a cutting board or plate making sure it is tight with no ripples. Then let your child draw pictures, write their name, and be creative with squeezable glitter glue. When they are finished, let it dry overnight, then peel the masterpiece off and stick on your windows. (Make sure to test a small area of your window first to make sure there is no damage) I found the glue at Joann.com for $1.50 per color.
Day 4: Plant an indoor garden:
Use a clear oblong container. You can buy a tupperware or recycle a container you have at home. Have your child fill it with potting soil, dig small holes, and place seeds in the holes. Teach your child to water it and place it where your family can watch it grow. The clear container allows your child to see the roots as the flowers/herbs/vegetable grow. (Tip: Let your child pick out the seeds at the store)
Day 5: Puzzles:
If your child has good fine motor skills, try putting together a 25-50 piece puzzle together. If your child struggles, try putting together a floor puzzle (it's just as fun, but has larger pieces). You can find floor puzzles at amazon.com
Day 6: Make your own play-dough:
Having your child help you, prepare the play-dough according to the directions. I found a recipe at Fun Family Education. Then sculpt, roll, squeeze, cut, and have fun!
Day 7: Puppet show!
Make puppets using brown paper lunch sacks, buttons, yarn (or whatever odds and ends you have lying around the house). Then use a table with a table cloth on it for the stage. You can write the story before hand or improv.
Day 8: Scavenger hunt:
This will take a little preparation without the help of your little one. Take pictures of different objects you have around the house (rubber duck, toy car, an article of clothing), and hide them. Then print the pictures onto one page. Give your child the page of pictures and a crayon. As they find each object, they can cross it out on the paper. When your child has found the last object, help them find the "prize".
Day 9: Plant flowers outside:
This may be an early morning or evening activity for us south-westerners. Give your child a couple of choices where they want to to plant flowers and let them pick. Then plant away. Let your child use a spade or small shovel to make the hole. After you put the flowers in the hole, let your child fill it in with dirt and pat it down.
Day 10: Tracing:
Pull out as many plastic dishes as you can. Then show your child how to trace the dishes onto paper with pencils and/or crayons. Then talk about the shapes and sizes they drew. If time permits, let your child cut out each shape. (This may require a little hand over hand help).
Day 11: Make a photo album:
With your supervision, help your child take 10 or 15 pictures with your digital camera. Then print out the pictures (at home or at a photo processing store). Using card stock or index, staple 10 or 15 papers together to make a book. Help your child come up with a title and write it on the first page. Then help your child glue one picture onto each page. Underneath each picture, your child can write (remember that sounding out and attempting is great) what the picture is.
Day 12: Bake a treat:
Pick an easy recipe that little hands can help with. Some good treats to make are: rice krispie treats, chocolate chip cookies, english muffin pizzas, no bake cookies. . . .
Day 13: Sort objects:
Fill a bucket with odds and ends around the house. Make sure some of the objects are related to each other. Let your child investigate the objects and see how they classify them. After they sort the objects, put them all back in the bucket and ask your child to sort them again, but in a different way. You may need to have your
own bucket of different objects to model how to do it for your child.
Day 14: "Car" Wash:
Fill a bucket outside with water and a little bit of dishsoap. Give your child rags and sponges and let them "wash their cars". Basically let them wash their outside toys such as bikes, cars, skooters. This is a win win situations. They have fun, and your outside toys get cleaned!
Day 15: Build a fort:
Use pillows, blankets, furniture, or whatever you need to build an awesome fort in the middle of your house.
Day 16: Run in the sprinkler:
Or play with a water table if you don't have any grass. :)
Day 17: Go Bowling
If you register your child at KidsBowlFree.com, they can have two free games everyday this summer!!!
If you don't want to go to a bowling alley, start saving your coffee creamer bottles, and clean them out. Then with a some little finger help, peel off the label, paint, decorate, and fill each bottle with sand (about 2 inches of sand). Then set up your the pins in a hallway or outside and let your child roll a ball towards them.
Day 18: Make marshmallow and pretzel buildings:
Using large marshmallows and pretzel sticks, help your child build structures of all types. Using marshmallows is fun because your child can stick as many pretzels in it as they want.
Day 19: Build!
Go to your local hardware store (or look around your house) and ask for scraps of wood. They should be pretty small and thin. Using nails and a hammer help your child nail them together. If you're feeling extra brave that day, pull out the washable paint and let them paint their masterpiece. Your child will love hammering in nails! *Please remember to supervise this activity the entire time.*
Day 20: Make confetti:
Give your child scraps of colored paper and a hole punch and let them go at it! If you have the hole punches that are different shapes (available at Joann's), even better! When they are done, have your child help put all the little pieces in a bag and save for future envelopes and packages you may mail later. *Some hole punches can pinch hands when they are closed. You may want to check yours before your little one goes crazy.*
Day 21: Alphabet hunt:
Using pre-made alphabet cards, tape them in different (but visible) spots around the house. Then help your child find each letter in order. Once they find the letter, they can grab it. You can re-do this several times (your child will most likely want to do it again). If your child has already mastered the alphabet, place sight words around the house. You say a word, and your child can go find the word and bring it to you.
Day 22: Write a story:
Use a notebook, or staple white paper together. Then let your child put stickers, stamps, or draw pictures on the pages. When they are done, ask them what is happening on each page, and write the story together.
Day 23: Make masks
Trace a mask shape on index or card stock and let your child decorate, and cut them out. Punch a hole on each side and connect with string or thin elastic. *Please help your child cut out the eyes.*
Day 24: Make leaf rubbings:
Go outside and find several leaves of different shapes and sizes. Place them under a piece of paper and rub over the leaf with a crayon. It tends to work better if you peel the paper off of the crayon and rub using the side of the crayon. *Try to find leaves that aren't completely dried out. Otherwise they may fall apart during the rubbing.*
Day 25: Make icecream:
This is a fun activity to do when it is hot. You can find the kid friendly recipe and directions at Disney Family Fun.
Day 26: Have a (indoor) picnic:
It may be way too hot to have a picnic outside, but there is no reason you can't enjoy one in your living room. Let your child help you make the sandwiches and sides. Place a blanket on the floor and use a basket just like you would do outside.
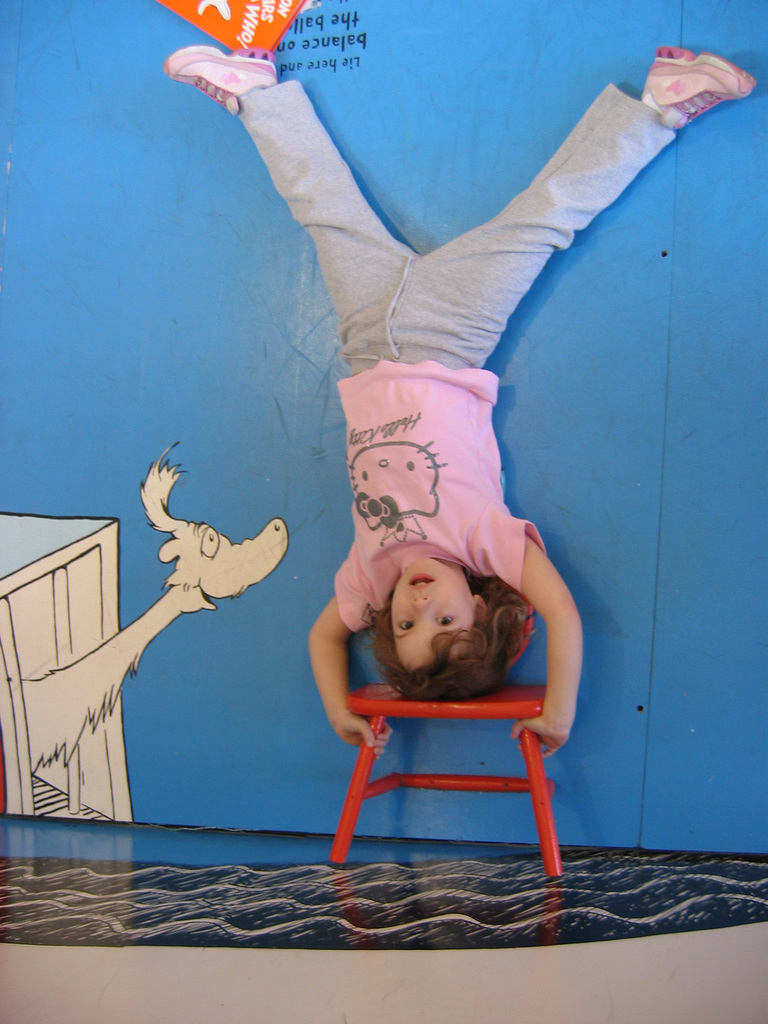
Day 27: Dr. Seuss day:
Start by collecting as many Dr. Seuss books as you can beforehand. Then start by reading "Green Eggs and Ham". Then make green eggs and ham for breakfast. Check out the post below to see more ideas.
Day 28: Family Memory:
Print out two pictures of each family member (if you have a small family, include pets, stuffed animals, grandma/grandpa) and glue them onto a three by five card. Then spread them over the table (upside down), and have fun playing memory!
Day 29: Indoor hopscotch:
Using masking tape, make a hopscotch board on your floor. Use a bean bag or other object to toss on the squares. *Please test a small area of your floor to ensure the tape doesn't damage it.*
Day 30: Bath your toys:
This is a great and FUN way to clean your indoor toys (of course only the ones that won't be damaged by water). Fill up your bathtub with water and bring in the toys that need to be washed. Let your child use a washcloth and bath soap to "bath" their toys. *THIS REQUIRES CONSTANT SUPERVISION BY AN ADULT. CHILDREN CAN DROWN IN JUST INCHES OF WATER*
Day 31: Make an edible necklace:
Help your child string edible items such as fruit loops, or cheerios onto a piece of yarn. It may help to wrap tape around the end of the string to make it stiff. This may help your child string the items on.

Friday 3/30/12
Music and Movement
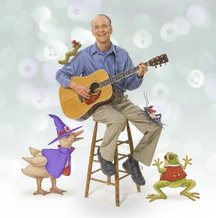
Singing, dancing, and listening to music can be fun activities to do with your child. Hap Palmer is an oldie but goodie. His songs are educational and intended for toddlers and preschoolers. My favorite CD is Learning Basic Skills Through Music Vol. 1. Here are some ideas of activities to do with each song.
Colors: Cut out different shapes in different colors and spread them out on the floor. When your child hears the color in the music, have them find the color and show you. Then have them tell you the shape name.
Marching Around the Alphabet: Write each letter of the alphabet on a separate piece of paper or card and lay them on the floor (out of order) in a circle. In socks, walk around the alphabet with your child while they hear the music (making sure to step on each letter). When the whistle blows, freeze and have your child tell you the name and sound of the letter they are standing on.
What is Your Name: This is a great song to have your child practice saying their name. It's also fun because your child can sing his/her name back to Hap Palmer.
You can do many more activities with his songs. This is just to start you off. Most of the songs you and your child can dance and move to, which promotes gross motor skills.

Friday 3/22/12
Play House
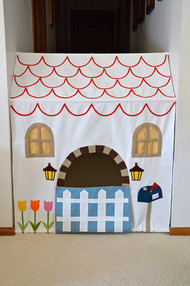
I found this super cute idea on a fellow blogger's page ikatbag. She is so creative, and I have to admit, I'm a bit jealous. :) Anyway, she used three tension rods to make a hallway playhouse for her daughters. Visit her site to see the directions and even more creative ideas from this fellow mommy.
Thursday 3/15/12
Easter Fun
If you are a family that celebrates Easter, here are a few fun activities to do with your preschooler.
In the kitchen:

Easter S'mores:
I found this super cute idea at steamykitchen.com Instead of making regular s'mores, these are Easter s'mores. To do this, take 1/2 of a graham cracker, place a Peep on it, then a piece of Hershey's chocolate, and top with the other half of the graham cracker. You can put it in the microwave until soft (only a few seconds), or heat under the broiler (but unfortunately little fingers shouldn't do this part).
Easter fruit plate:

This is a cute and healthy idea that your child can help you create. The Preschool Toolbox also has many more additional Easter activities.
Your child can do the majority of this activity. After you slice the strawberries, let your child put the other fruit on the plate to create an egg shape. This also is good for the classification (categorizing) skill. If you want it to be a completely healthy treat, you can go without the Peeps.
Your child can do the majority of this activity. After you slice the strawberries, let your child put the other fruit on the plate to create an egg shape. This also is good for the classification (categorizing) skill. If you want it to be a completely healthy treat, you can go without the Peeps.
Math:
Numerical Order
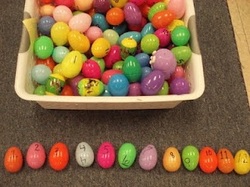
Ordering numbers can be a hard concept for little ones. This is a fun activity that I found on the blog Under the Big Top . To do this, you can write numbers on plastic eggs and place them in an easter basket. I would start off with (1 set) of either 1-5 or 1-10. Then mix them up in the basket. Have your child try to find 1, then 2, and so on. When they master those numbers, add more (to 25) and then add more sets. You can make this as easy or challenging as you want.
Note: This is my explanation for the game. Please check the blog for their rules.
Note: This is my explanation for the game. Please check the blog for their rules.
One to one counting:
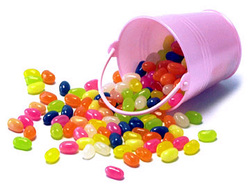
These jelly beans are from Candywarehouse.com
One to one counting means that your child can touch each object and count them. This may sound easy to you, but can very challenging for a child. Some kids touch or grab two objects and say "1". To practice this important skill, put a bag of jelly beans in a bowl or basket. Then have your child take one out at a time and line them up (so they don't get confused when they count). Only start with 5 or 10 jelly beans lined up. Then practice counting them with your child, making sure they are touching each one. They can also grab a jelly bean and count "1", and put it back in the basket, then grab another jelly bean and count "2" and put it back in the basket and so on.
3/7/12
Dry Erase Marker Magic
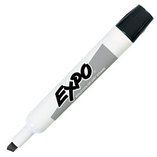
There are so many ways to use dry erase markers. You may think that you have to use them on just a white dry erase board, but that's not the truth. Here are other ways to use these fun markers with your child.
* Notes: Please make sure you test a small area of the surface you want to use the markers on to ensure it comes off. Also make sure your child has clothes on that can be stained. Dry erase stains!!! And last... you may want to teach your child that it's not ok to write on every surface of the house (Haha, I can imagine a lot of Magic Erasers at use). :)
- Windows: You can use a dry erase marker on a window and then wipe it clean. This is a huge canvas for your child to draw or even better practice writing their letters, numbers, or words.
- Old picture frames: You can use an old picture frame or buy a very inexpensive one (as long as it is safe with no broken parts) and let your child draw a new picture everyday for you to hang up.
- Glass tables: These work the same as a window or picture frame. Imagine how exciting it would be for your child to write their name on the table where they sit or write the words of the foods they are eating. They can even draw a plate and draw their meal.
- Mirrors: I would use full length mirrors that are attached to the wall or the mirrors on sliding closets for safety, but these are super fun. They can be a bit tricky because the drawings/letters/numbers reflect, but it also looks pretty neat. Your child can also look at themselves the whole time. :)
3/2/12
Happy Birthday Dr. Seuss
"Green Eggs and Ham"
Today is the perfect day to do fun Dr. Seuss activities with your child. Here are some ideas.
- Breakfast: Read "Green Eggs and Ham" and then have green eggs and ham for breakfast. If your child doesn't eat eggs, you can make a green pancake and put a vanilla wafer in the middle so it looks like an egg.
- Breakfast: Read "Green Eggs and Ham" and then have green eggs and ham for breakfast. If your child doesn't eat eggs, you can make a green pancake and put a vanilla wafer in the middle so it looks like an egg.
"There's a Wocket in my Pocket":
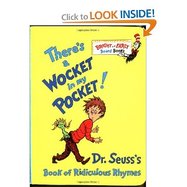
- After reading this fun book, go through the house and collect something from each area (the closet, kitchen, etc) and put them in a basket. Then practice rhyming (rhyming is a huge beginning step to reading). You may need to help your child at first come up with silly rhymes, but they should get the hang of it. After they think of a rhyme, draw and color it on paper and staple it to make their own Dr. Seuss book. For example, if one item you collected was a spoon, the rhyme you could make up is "There's a spoon on the moon." Then draw a silly picture of the spoon on the moon. The words don't have to make sense either. Have your child make up a word and tell you what the word is and they can draw it.
"One Fish Two Fish Red Fish Blue Fish"
- Lunch:
Using Pepperidge Goldfish Bread, you can make your own 1 Fish 2 Fish Sandwiches. To add a little zest, add whatever color food coloring to the mayonnaise and let your child spread it on the bread.
Using Pepperidge Goldfish Bread, you can make your own 1 Fish 2 Fish Sandwiches. To add a little zest, add whatever color food coloring to the mayonnaise and let your child spread it on the bread.
Bartholomew and the Oobleck
You can either make your own Oobleck or you can simply use green play dough. Have your child practice roll it into snakes, and squeeze it (this helps with fine motor skills). They can also make letters or numbers.
Dr. Seuss Cookies

Snack: These cookies are perfect to make with your little one. I found them at Souder's Cookery.
- Use either a sugar cookie mix or your favorite sugar cookie recipe.
- Then divide the dough into five bowls.
- Add a different color of food coloring to each bowl and mix well.
- Make little balls out of each color and combine 1 ball of each color.
- After the balls are combined, roll them into a snake and coil.
- Then roll the coiled cookie dough in sprinkles.
- Follow the recipe to see how long they need to bake.

2/28/12
Letter Slap!
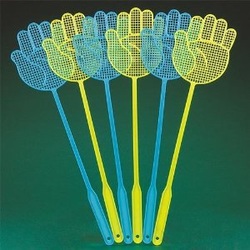
One of the fun ways I've taught pre-schoolers and kinders their letters is by slapping. Yes, I said slapping! That's the best part. They love that it's ok to slap the table and make a loud noise. The bonus. . . . . they get to use fly swatters (new and clean).
Here's how to play Letter Slap:
- Buy fun colored or shaped fly swatters for each child (they are usually sold at the dollar store).
- Then spread letter flash cards on the table (you can also put foam letters or other letter sets you have. It's better if they are larger letters.).
- Call out a letter name or sound. Then have your child or children slap it as fast as they can. If they slap the correct letter, they get to keep it.
- At the end, have each child count the letters they've slapped (this is good for one to one counting skills).
~~~~~~~~~~~~~~~~~~~~~~~~~~~~~~~~~~~~~~~~~~~~~~~~~~~~~~~~~~~~~~~~~~
- You can substitute letters with numbers or words (whichever your child is ready for).
- To add another skill, spread out letters with different fonts. That way they will learn to recognize letters that don't always look exactly the same.
- You may want to put a couple sets of letters on the table if you're playing with more than one child. That way each child can find a letter.
- Another fun idea: Together with your child, write and color your own letters.
If you don't have a dollar store near you, I found a set on Amazon.

2/21/12
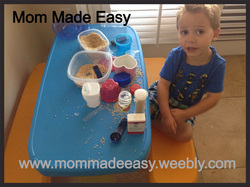
Sensory Fun
Sensory activities are important for your child's academic development. Children learn through different modalities, touch (kinesthetic), visual, and auditory (hearing). Sensory activities use all of these modalities. The best part about sensory activities; they are fun! Your child will love doing these important and fun activities. Here are some ideas to do at home:
- "Feely boxes" (kinesthetic and visual): Take an old diaper box or large shoe box and cut a hole in the side big enough for your child's hand to fit in. Then fill it with different (small) items you have around the house (only about 4 or 5). Then tape the top closed. Tell your child to pick up one thing in the box and feel it. Then have them describe it to you. (This also helps with language development). Then have them guess what it is. After they guess, they can pull it out and see if they are right! You can do this over and over with different items. Some ideas for items are a small rock, a sponge, a cup (small enough to fit through the hole so your child can pull it out), a spoon, a diaper, a sock, and a leaf. I would put items with many different textures so they can use more descriptive words. (If your child tends to put things in their mouths, please make sure you put large items that they can't choke on in the box).
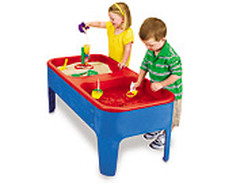
- Sand or water table (kinesthetic and visual): You can buys these all ready to go, or you can make your own. I suggest you use these tables outside. :) You can make your own sand or water table by using a large but shallow Tupperware and putting it on the ground or existing table. You can fill it with either water or sand and put different items in so your child can explore. Some ideas are cups, spoons, funnels, squirters (for the water table). You can also hide objects in the sand and have your child find them. (If you can't find sand, you can use rice instead).
- Pudding (kinesthetic and visual): You can go the messy route or the clean route. :) Clean route: Put chocolate pudding in a gallon size ziploc bag and squish all the air out of it. Then lay it on a table so the pudding is flat. Then your child can draw pictures in the pudding or write their letters or their name or so on. The messy route would be just to put the pudding in a baking sheet and let your child explore with their fingers.
- Directions game (auditory): Give your child two fun directions (you may need to start with only one direction at the beginning). For example, "touch your toes", "find the toy", "pick up one piece of cereal". You can even give them prizes at the end.
- "Feely boxes" (kinesthetic and visual): Take an old diaper box or large shoe box and cut a hole in the side big enough for your child's hand to fit in. Then fill it with different (small) items you have around the house (only about 4 or 5). Then tape the top closed. Tell your child to pick up one thing in the box and feel it. Then have them describe it to you. (This also helps with language development). Then have them guess what it is. After they guess, they can pull it out and see if they are right! You can do this over and over with different items. Some ideas for items are a small rock, a sponge, a cup (small enough to fit through the hole so your child can pull it out), a spoon, a diaper, a sock, and a leaf. I would put items with many different textures so they can use more descriptive words. (If your child tends to put things in their mouths, please make sure you put large items that they can't choke on in the box).
- Sand or water table (kinesthetic and visual): You can buys these all ready to go, or you can make your own. I suggest you use these tables outside. :) You can make your own sand or water table by using a large but shallow Tupperware and putting it on the ground or existing table. You can fill it with either water or sand and put different items in so your child can explore. Some ideas are cups, spoons, funnels, squirters (for the water table). You can also hide objects in the sand and have your child find them. (If you can't find sand, you can use rice instead).
- Pudding (kinesthetic and visual): You can go the messy route or the clean route. :) Clean route: Put chocolate pudding in a gallon size ziploc bag and squish all the air out of it. Then lay it on a table so the pudding is flat. Then your child can draw pictures in the pudding or write their letters or their name or so on. The messy route would be just to put the pudding in a baking sheet and let your child explore with their fingers.
- Directions game (auditory): Give your child two fun directions (you may need to start with only one direction at the beginning). For example, "touch your toes", "find the toy", "pick up one piece of cereal". You can even give them prizes at the end.
2/18/12
Magnets Are Always Fun!
I have found preschool age children love to play with magnets! (If you purchase magnets, make sure they are large enough so they can't be swallowed). There are all sorts of magnets you can buy for exploration. I've seen gear, rods and balls, horseshoe, and alphabet magnets. These are also great for your child to use on the appliances while you are in the kitchen.
Horseshoe Magnet:

Your little one can explore around the house with this magnet and see what sticks! It also has a handle to make it easier for little hands to hold.
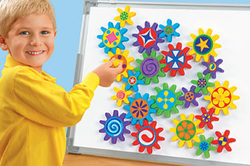
Gear Magnet
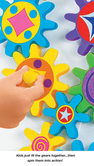
These magnets may be hard for toddlers, but are great for cognitive reasoning. You can find these fun magnets at one of my favorite teaching stores: Lakeshore Learning and lakeshorelearning.com.
Rods and Balls:
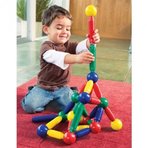
These magnets are great for small hands because they are big and easily go together. They are great for both exploring and building.
Alphabet:

These are great for so many reasons! You can practice spelling your child's name, letter recognition, sound recognition, sounding out words, learning blends (blending sounds together when sounding out words such as "br", "st")..... you get my point. I like the Lakeshore Learning magnets because they are big and easier for little fingers to pull on and off of magnetic surfaces.
These are just a few of my favorite types of magnets for preschool explorers. There are also many other types available. There are number, shape, money (for much older kids), and sight word magnets (also for older kids). You can find these all at http://www.lakeshorelearning.com
